Odoo’s accounting module is a sophisticated accounting management system that can easily handle massive amounts of data. The Odoo Accounting module is effective and easy to use due to its user-friendly nature and integration of highly powerful technologies.
This article will walk you through the basic setups of the Odoo 15 Accounting module in detail.
Company Data
Because of the module’s fully integrated structure, the initial setup and configuration are simple. As seen in the image below, the accounting module will greet you on its dashboard with step-by-step directions on how to set up the module.

Below are the many phases of setting up the module. To begin, fill up the Company data area with your company information, and the configuration page for setting your company information will appear, as seen in the image below.
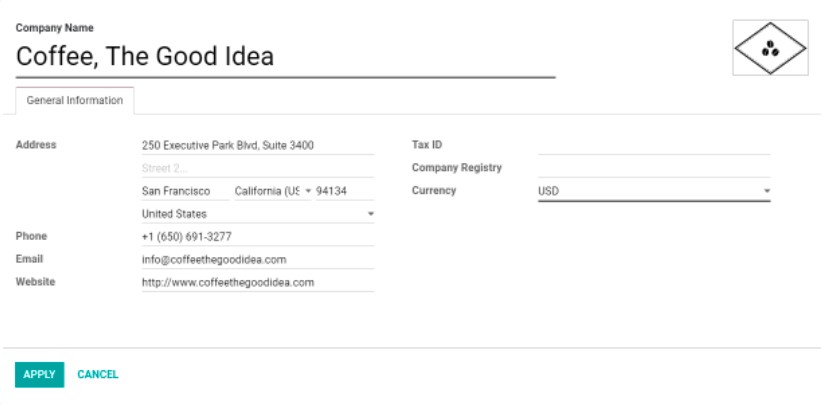
On this page, you may fill in all of your company’s information. You may begin the setup by inputting your company’s name. To specify your company’s tax activities, you must select a tax Id from the Tax id drop-down menu. You may enter all of your company’s address data in the Location part of the setup page. This will assist Odoo to identify the address for future activities. To control the process rapidly from easy management, click on the advanced capabilities in the module. You may also enter the information for the company register. It’s worth noting that customizing the firm’s details will assist Odoo in fully integrating the accounting module with the company.
The next step in the setup is to select a currency from the currency field. Choose the currency of the nation in which your business is at. It’s worth noting that Odoo will handle accounting activities in accordance with the currency. Odoo will be able to identify multiple currencies and convert them into your currency in real time, making international transactions easier for your staff. You may fill in the phone number, email address, and website address. The data will serve as a framework for the module and work with Odoo. To proceed to the next setup stage, press the SAVE button after completing the setting.
Bank Configuration
To enhance account and transaction management efficiency, the following core setup is to synchronize your Bank with the Accounting module. To utilize the accounting module, you must first link Odoo to your bank account. The setup part allows you to fill in your bank account name, account number, Bank, code, and journal; the procedure is simple.
Go to the configuration tab to add new bank accounts to the module for simple administration and accessibility.
To learn more about the Odoo 15 Accounting module, talk to our Odoo Consultants
You may add the accounting periods and Chart of Accounts once you’ve configured the bank account.
Accounting period and chart of account
As illustrated in the figure below, you may add accounts to the chart of accounts’ menu.
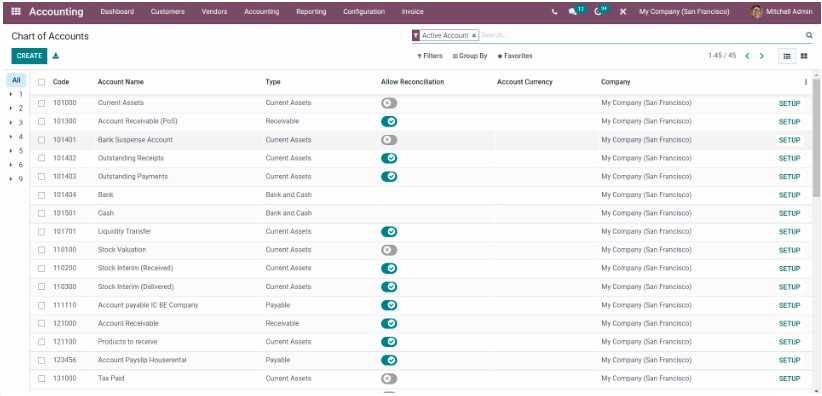
This page allows you to manage all of your accounts. By selecting the CREATE option, you may add other accounts to the chart.
After configuring the bank and company account data, you may use the module to design and generate an invoice for your business. Follow the link to learn all there is to know about making and handling invoices with Odoo.
You may create and add several accounts to the chart after the first setting to manage them efficiently.
Fiscal localization
It should be set up at the very initial point after installing the accounting management module. Fiscal localizations are quite beneficial to your tax and account management. Installing the Fiscal localization packages allows you to customize the Fiscal localization.
Fiscal localization packages are country-specific modules that include pre-configured taxes, fiscal positions, chart of accounts, and legal paperwork that can be applied to the Odoo database and connected to the accounting module. Note that Odoo will install the package for the configurations and country you choose during database set-up automatically.
The accounting module makes configuring fiscal localizations a breeze. Go to the configuration in the accounting module and look for the Fiscal country option, which you can see in the figure below.
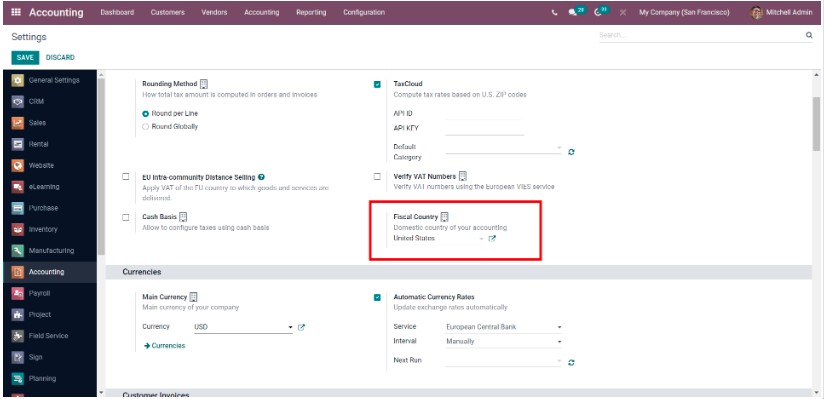
You may choose a country from the drop-down menu and handle it effectively by clicking the external link next to it. To easily control the process, use the sophisticated capabilities of the module.
Follow and read our posts on fiscal localizations to learn more about them and the supporting nations’ setups.
The module’s initial setup is easy. You may complete the entire configuration setting procedure in minutes thanks to the module’s straightforward and easy-to-use interface. Because the module is tightly connected with the Odoo database, all of your data, including your colony data, will be immediately loaded and classified on the module based on the settings you provided during setup.
The Accounting module is simple to use and administer. After the module’s initial configuration, you may simply manage and alter it at any moment for easy management. The module’s automated nature makes it simple to manage complex and very intricate business data effectively and without data loss.
Tax Return Periodicity
The Tax Return periodicity field assists in determining the time period for filing the tax returns. This may be determined by looking at the periodicity. That is why you have alternatives such as monthly, yearly, semi-annually, every four months, and so on.

The figure above shows that we may schedule reminders for our tax returns. You may also manage the journal where you must submit the tax return data. Another alternative is to configure your tax accounts.
Rounding method
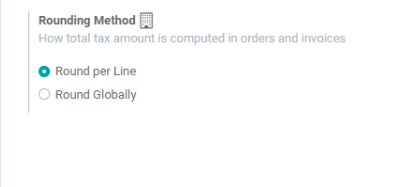
This approach assists us in determining how total tax amounts are computed in orders and invoices. When the product prices are set, including the tax amount, you may select Round per Line.
Tax Cloud
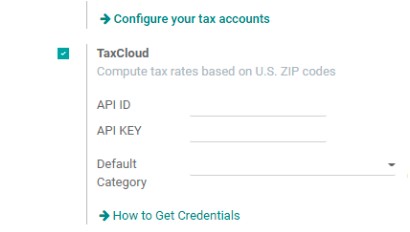
Tax Cloud is also included in this section. They may be calculated here using US ZIP Codes. You may also choose the default category from the list above. You also have the EU Digital Goods Vat, which allows you to apply the right VAT rates on digital items sold in the European Union. Another feature is Cash Basis, which allows the user to arrange taxes on a cash basis. The fiscal country setting is another feature. When you pick a nation, you will only receive tax reports for that country.
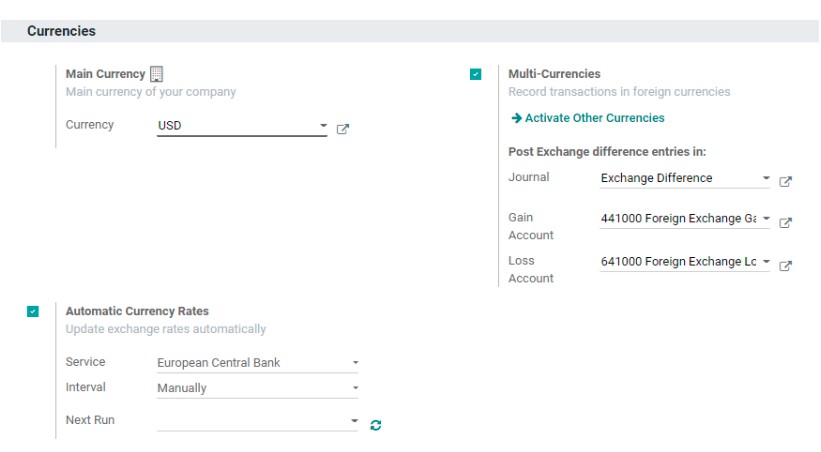
Under Currencies, you have subsections such as primary currency, multi-currency, and automated currency rates.
Main Currency
This section assists us in determining the primary currency utilized by our organization. If you run a business in the United States, the major currency will be USD.
Multi Currencies
This capability also allows us to conduct transactions in international currencies. You can activate other currencies from this page. This will assist us in posting exchange disparities in various journals, and gain and loss accounts.
Automatic currency rates
Another currency-related option is to set automated currency rates. This allows you to automatically update exchange rates when you choose the service bank, interval, and next run. When we manually specify the interval, we may utilize the next run option. That is, you might choose the date on which you must decide on an exchange rate.
Customer Invoice
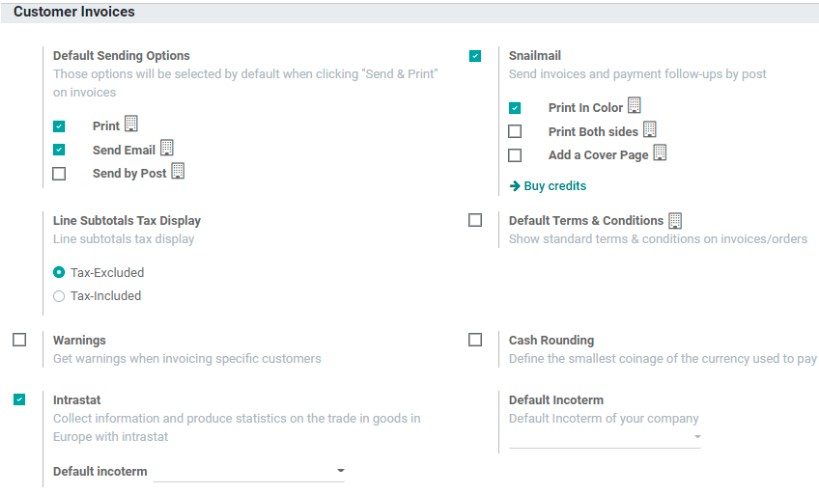
You may properly manage our customer bills by activating several settings here.
You might also like to know about ERP Software Pricing, click here to read!
Conclusion
Finding the correct ERP software for your start-up or small to medium-sized business can be difficult. However, it is critical to pick an ERP system that will expand your business. The best ERP software for startups and SMBs is built to your specific industrial needs, allowing it to scale as your business grows.
Target Integration has been supporting small-scale enterprises by assisting them to scale, expand, and succeed through technological advancements. Our professionals would gladly assist you with your ERP requirements. We first examine your company and then propose business software that is appropriate for your needs.


